

CardMaker Tutorial: Basic: Creating a Basic Deck of Cards
This is a basic guide to creating a reasonably simple deck using the CSV editor of your choice and CardMaker.
- Load your CSV (comma separated value) spreadsheet editor of choice -- here are some recommended options:
- OpenOffice Calc - Free, very organized, and has a mind of its own. (this tutorial shows images from Calc)
- Microsoft Office - Not free, very organized, and has a mind of its own.
- Text Editor - Hopefully free, totally unorganized, and you completely control it.
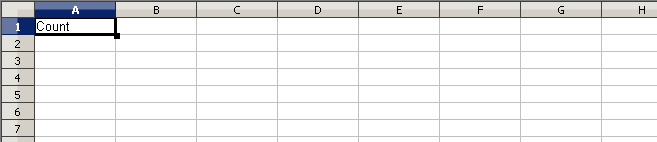
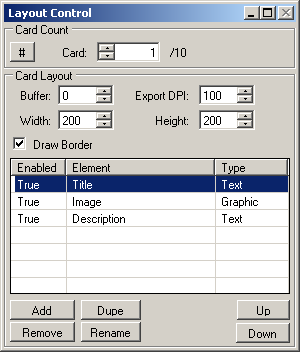
- Setup the required column -- The only column that is actually required is the first. I recommend naming it "Count" as it will avoid any confusion. This represents the counts of each card based on this reference file.
- Setup the reference columns - These are the variable bits of information that will be used to create your card. Each row of the spreadsheet represents a card.
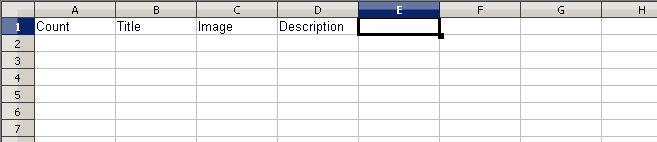
- The remaining columns are for you to decide based on the contents of your card. There is no limit on the number though for your own sanity I do not recommend too many! For this tutorial I created those shown below. It is important to note that the column name can be anything!
- Title - This column will contain the title displayed on the cards
- Image - This column will contain the image displayed on the cards
- Description - This column will contain the descriptive text on the cards
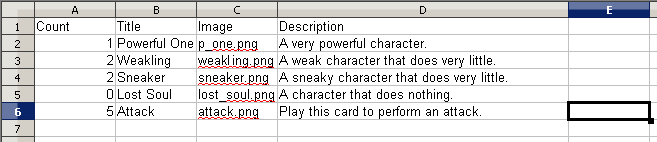
- In the image below you can see the populated versions of each row representing a single card. In a few cases I have the count set to something greater than 1 resulting in card duplication. If the count is set to 0 the entire row is ignored.
- Save your spreadsheet to a CSV formatted file (varies based on the application). I highly recommend you save the file into a new folder somewhere that is easy to access/remember.
- Load CardMaker
- (optional) Download this zip file containing some sample images and my CSV file. Decompress the file into a new folder for use below.
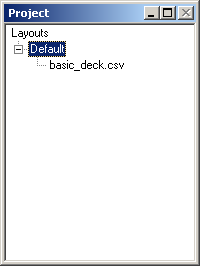
- Add a Reference to the desired CSV(yours or the one you downloaded in the optional step above) by right-clicking the Default layout in the Layout window and selecting "Add Reference..."
- Create 3 new elements as follows:
- Name: "Title" Type: Text
- Name: "Image" Type: Graphic (change the type in the Element Control window) -- if you don't see the type change in the Layout Control window it's just a harmless bug in the application (shhhhhh!)
- Name: "Description" Type: Text
- Save your project at this time (File - Save). It is critical to save your project so CardMaker can attempt to load any images specified in the Reference CSV.
- Change the Definition of each Element as follows:
- Title: "@[title]"
- Image: "@[image]"
- Description: "@[description]" (sample image below for the Description Element)
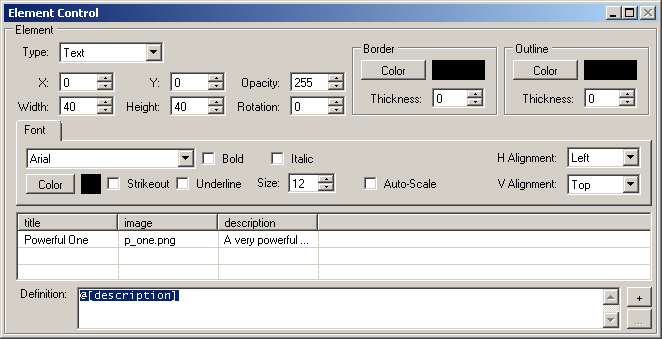
Note: The column name and element name are completely independent. They just happen to be the same for this example. It is the conversion of the @[?] string that pulls in the data from the given reference column.
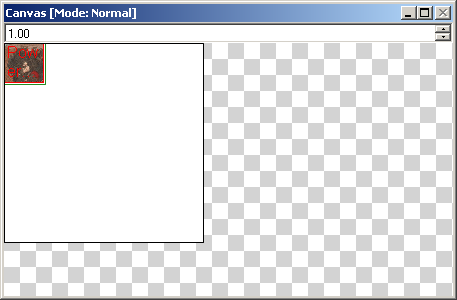
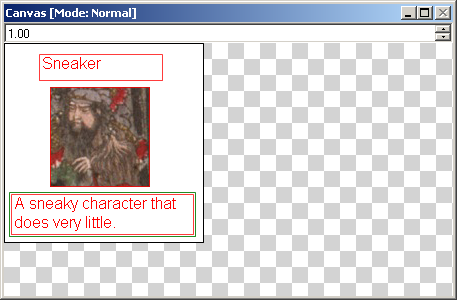
- Organize your Elements in the Canvas window to not overlap. (see the before and after below)
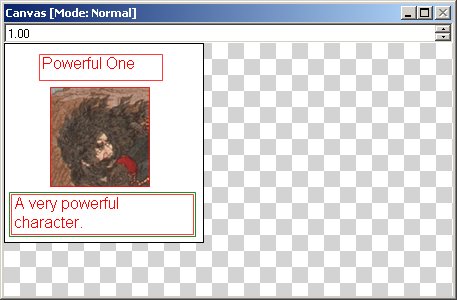
- Use the up/down arrow keys in the Layout Control field named "Card" to cycle through your cards. Card #5 for my sample can be seen below.
- Remember that every row in the CSV represents a card definition. The columns make up the available variables when populating the Definition of an Element. Also every layout in your project may reference a different CSV file.
- You can disable the Element border drawing by pressing F4 or selecting the option under the View menu - "Draw Element Borders"